
Learn how to easily disable Multi-Plane Overlay (MPO) in Windows 11. Fix random crashes, game freezes, and stuttering on AMD and NVIDIA graphics cards.
How to Disable Multi-Plane Overlay (MPO) in Windows 11 to Fix GPU Crashes and Stuttering
Few things are more frustrating than being deep into a game only for the screen to freeze out of nowhere, forcing a sudden crash to desktop just minutes into your session.
If you’ve run into this issue on your PC, you’re definitely not alone. It’s a surprisingly common glitch where your display turns black for a few seconds before popping up that classic error warning that your GPU driver has crashed. Other times, the bug is a bit more subtle—it might not crash the game outright, but it causes micro-stuttering or frame drops when Alt-Tabbing, watching a video on Chrome, or running a Discord overlay in the background.
While it’s easy to assume high temperatures, an unstable undervolt, or a faulty driver are to blame, the real culprit is often a built-in feature in Windows called Multi-Plane Overlay (MPO). In this guide, we’ll break down what this technology actually does, why it causes instability on AMD and NVIDIA GPUs, and how to safely disable it in just a few clicks.
What Is Multi-Plane Overlay (MPO) and Why Does It Cause Crashes?
Multi-Plane Overlay (MPO) is a feature introduced in recent versions of Windows that allows the Desktop Window Manager (DWM) to offload independent visual layers directly to the GPU for separate rendering. On paper, it’s a great concept: it frees up system resources, reduces input lag in borderless windowed mode, and smoothes out video playback and floating app menus.
The problem is that Windows 11’s implementation of MPO doesn’t always play nice with modern graphics architectures or driver updates. When the operating system tries to draw an app overlay over a demanding DirectX 12 game, the rendering instructions can get desynchronized.
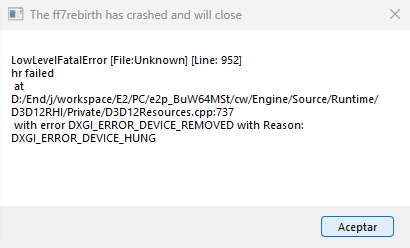
This timing conflict trips up the graphics card, leading to notorious errors like DXGI_ERROR_DEVICE_HUNG or GPU driver timeout crashes (TDR events). Disabling MPO won’t hurt your gaming performance; if anything, it forces Windows back to traditional desktop composition, restoring rock-solid stability instantly.
How to Disable Multi-Plane Overlay (MPO) in Windows 11
Method 1: Using the MPO-GPU-FIX Tool (Recommended)
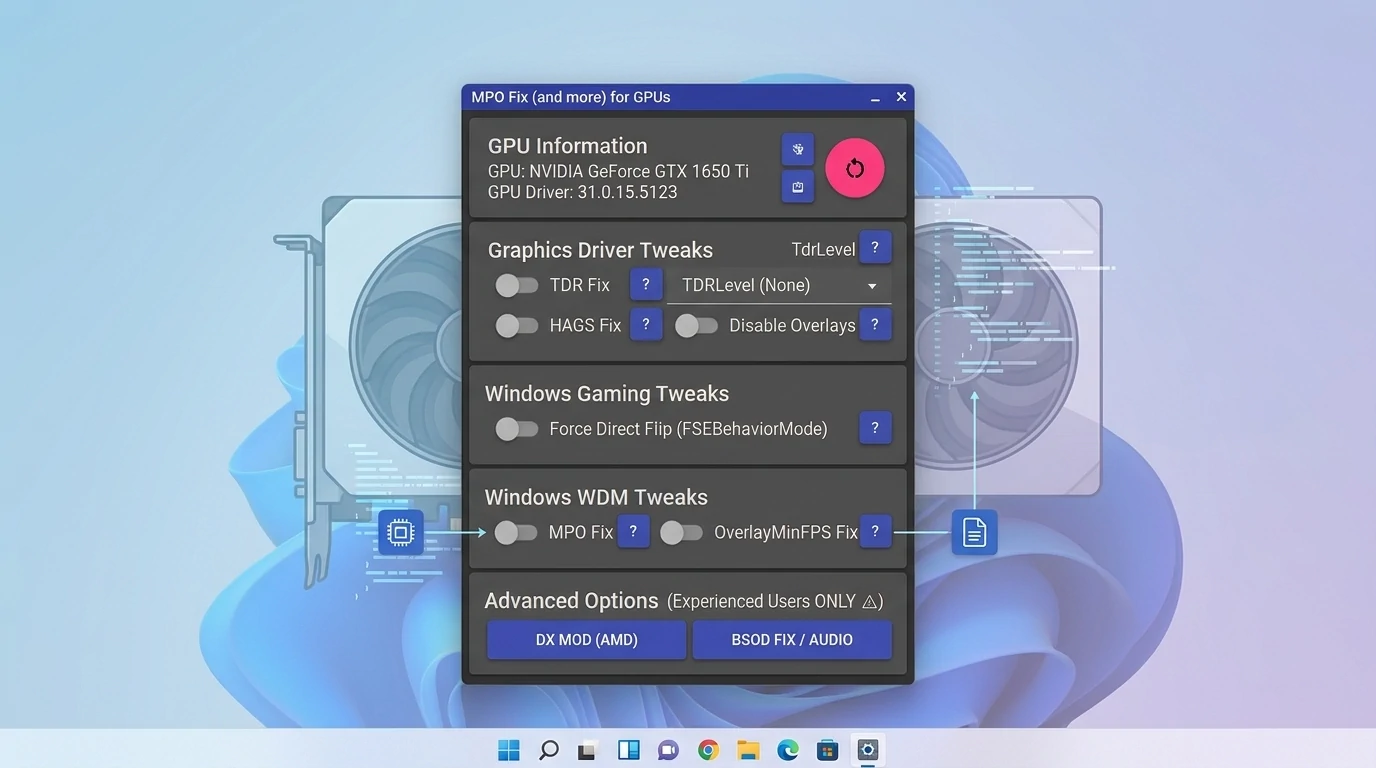
If you’d rather not mess with the Windows Registry by hand, the tech community has built open-source utilities to handle it for you. The most straightforward tool available is MPO-GPU-FIX—a lightweight portable app that lets you toggle MPO and other critical system tweaks with a single click.

- Head over to the official GitHub repository for MPO-GPU-FIX and download the latest version under the Releases section.
- Extract the zip folder, right-click the executable file, and select Run as administrator.
- Under the Windows WDM Tweaks section, toggle the switch next to MPO Fix to turn it on.
- Reboot your PC to let Windows apply the changes.
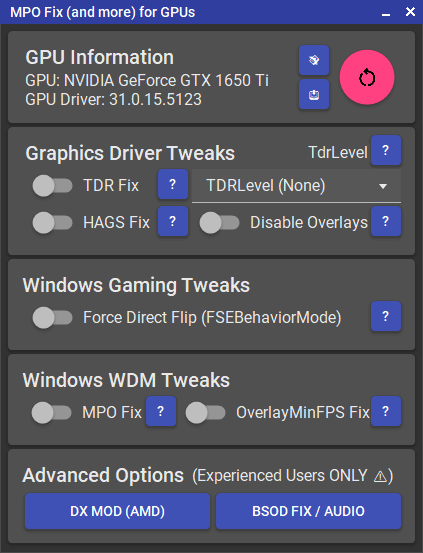
Handy Extra Tweaks in MPO-GPU-FIX:
While you have the app open, you might also want to check out two additional toggles in the Graphics Driver Tweaks section if your games keep freezing:
- TDR Fix: Increases the response window Windows gives your GPU before assuming it crashed. This prevents the OS from killing your game during sudden rendering spikes.
- HAGS Fix: Disables Hardware-Accelerated GPU Scheduling in Windows—a setting known to cause hitching and micro-stutters when running background apps or screen recorders.
If you ever want to undo these tweaks in the future, simply re-open the utility, turn off the switches, and restart your computer.
Method 2: Via the Windows Registry (regedit)
If you prefer making system adjustments manually without downloading third-party software, you can modify the Registry key yourself in under two minutes.
- Press
Win + Rto open the Run dialog box, typeregedit, and press Enter. - In the address bar at the top, navigate to the following path:
HKEY_LOCAL_MACHINE\SOFTWARE\Microsoft\Windows\Dwm - Right-click any empty space in the right pane, select New > DWORD (32-bit) Value, and name it exactly:
OverlayTestMode - Double-click your newly created entry, set its Value data to
5(Hexadecimal or Decimal works fine here), and click OK. - Restart your PC.
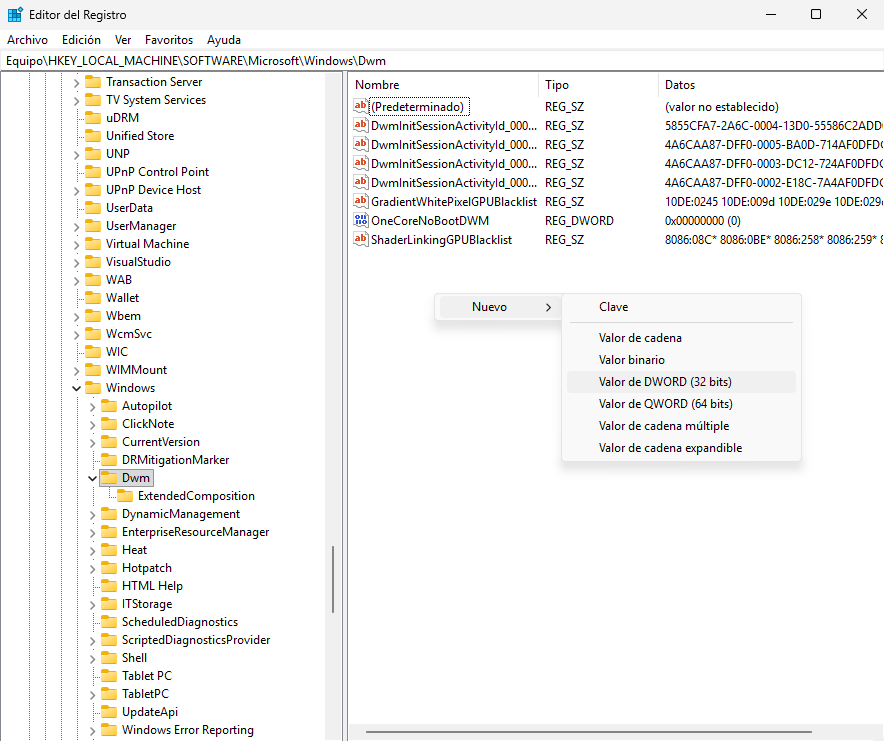
Should you ever need to re-enable MPO down the road, navigate back to the same folder inside regedit, right-click OverlayTestMode, and click Delete.
Method 3: Quick Fix Using a Custom .reg File
Another neat shortcut—especially if you want to avoid digging through Registry keys—is building your own .reg file using Notepad.
- Open Notepad on your computer.
- Copy and paste the following script into the blank document:
Windows Registry Editor Version 5.00

[HKEY_LOCAL_MACHINE\SOFTWARE\Microsoft\Windows\Dwm]
"OverlayTestMode"=dword:00000005
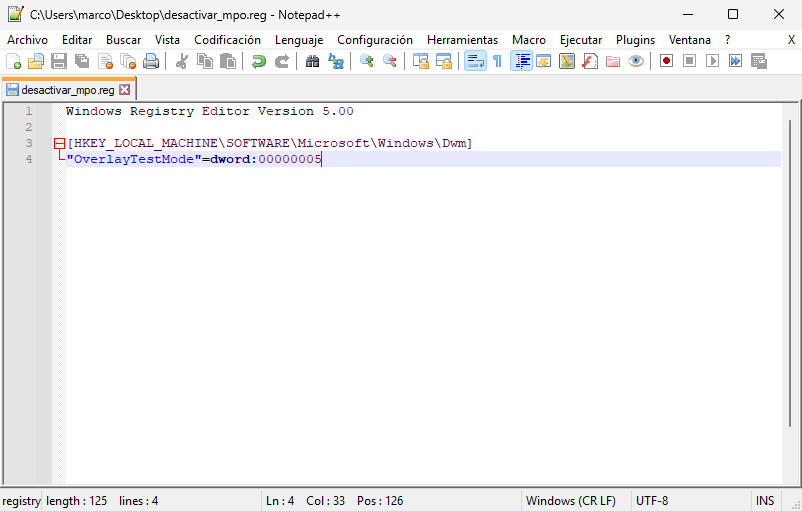
- Go to File > Save As, change the Save as type dropdown to All Files (*.*), and name the file
disable_mpo.reg. - Double-click your new
disable_mpo.regfile, confirm the Windows UAC security prompt, and restart your PC.
An Easy Fix for an Annoying Windows Glitch
Turning off Multi-Plane Overlay is easily one of the most reliable ways to eliminate random black screens, sudden game crashes, and desktop stuttering in Windows 11. Since it doesn’t affect your GPU’s raw performance or tamper with clock speeds, it should always be your first troubleshooting step before jumping to hardware worries or fresh OS reinstalls.